Category: Recipes

  • GF Jules Recipe: Easy Rum Balls

    GF Jules Recipe: Easy Rum Balls

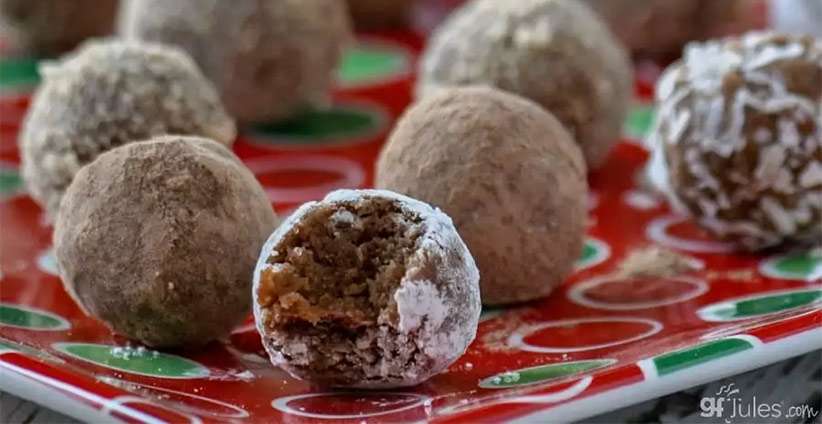
    Rum is fun. Balls are fun. Put them together and you’ve got the perfect little treat.

    Rum Balls

    Prep Time: 1 hour
    Cook Time: 35 minutes
    Servings: 9-12

    INGREDIENTS

    • 2 1/2 cups gluten free crispy rice cereal (Erewhon; Nature’s Path; One Degree)
    • 1 cup chopped pecans or walnuts
    • 1 cup sifted confectioner’s sugar (or Swerve confectioner’s sugar replacement)
    • 3 Tbs. baking cocoa Dutched OR gluten free chocolate protein powder OWYN dark chocolate protein powder
    • 1/4 cup spiced rum (or apple cider)
    • 3 Tbs. agave nectar coconut nectar OR honey (honey is not vegan)
    • 1 Tbs. water
    • confectioner’s sugar coconut, gluten free sprinkles … OR other dry ingredients for rolling the balls in

    INSTRUCTIONS

    1. In a large food processor, process cereal until uniformly crumby. Transfer to a bowl and process the pecans in the food processor until finely chopped. Return the cereal to the processor bowl with the chopped pecans; add sugar and cocoa powder/chocolate protein powder. Pulse just to combine the dry ingredients.
    2. Add rum, agave and water and pulse just until a dough forms. If the dough is too dry to hold together easily in a ball, add another tablespoon or two of water until it holds together.
    3. Roll tablespoon-sized balls of dough between your palms, then roll in more sifted confectioner’s sugar, gluten free chocolate jimmies or sprinkles, grated coconut, more crushed crispy rice cereal or more protein powder or cocoa.

    Link to full recipe on Jules’ site.

  • GF Jules Recipe: Tiramisu

    GF Jules Recipe: Tiramisu

    I used to LOVE Tiramisu. Like if a restaurant had it, I’d eat my dinner quicker so I could get to the dessert.

    I have not had it since my celiac diagnosis. But that all changes today. This recipe from Jules is not only GF but also dairy free.

    Enjoy. Just save me the last bite.

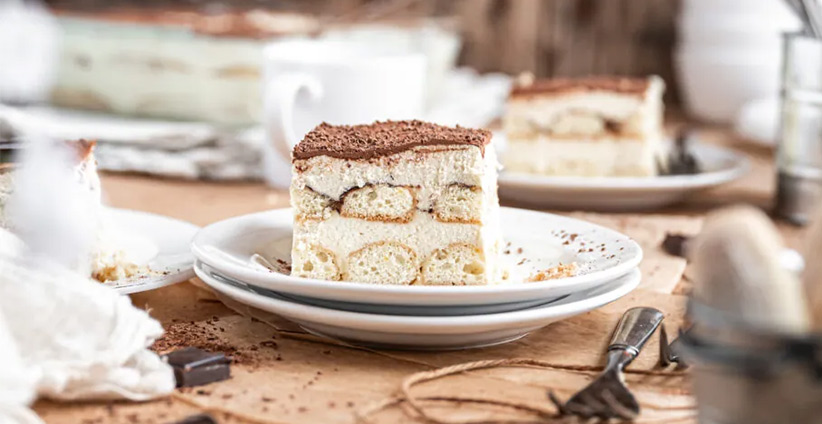
    Tiramisu

    Prep Time: 1 hour
    Cook Time: 35 minutes
    Servings: 9-12

    INGREDIENTS

    Gluten-Free Ladyfingers

    • ½ cup cane sugar
    • 3 large eggs room temperature
    • 1 teaspoon pure vanilla extract
    • 1¼ (169) cup (grams) gfJules All-Purpose Gluten Free Flour
    • ¼ teaspoon salt
    • ½ teaspoon baking powder
    • ¼ cup powder sugar for dusting
    • ¼ cup cane sugar for dusting

    Gluten-Free Tiramisu

    • 5 large egg yolks
    • ½ cups cane sugar
    • 16 ounces vegan cream cheese, room temperature (like Miyoko’s Creamery)
    • ¼ teaspoon sea salt
    • 2 teaspoons pure vanilla extract
    • ¾ cup dairy-free heavy cream (like Silk)
    • 1 cup strong brewed coffee, chilled
    • cocoa powder for dusting

    INSTRUCTIONS

    To make Gluten Free Ladyfingers:

    1. Preheat the oven to 350°F and line two baking sheets with parchment paper. Prepare a piping bag with a round tip or cut one corner off of a plastic bag (about ¾” wide hole).
    2. Divide the three eggs by placing the three egg yolks in a mixing bowl and placing the three egg whites in another mixing bowl.
    3. Add a pinch of salt to the egg whites and beat them on high until stiff peaks form, about 2-3 minutes. You can use hand-held beaters or a stand mixer with the whisk. Place the whipped eggs whites in the fridge for a moment.
    4. Add the sugar and vanilla to the bowl of egg yolks. Beat until they are creamy and have about tripled in volume, about 1-2 minutes.
    5. Remove the egg whites from the fridge and scoop about a quarter of their volume into the yolk mixture. Use a spatula to fold everything together, then fold in the remaining egg whites.
    6. Add the gfJules Flour, salt, and baking powder. Gently fold everything together until a smooth batter forms.
    7. Scoop the batter into the piping bag or plastic bag. Pipe 3-4” long cookies onto the baking sheets, leaving about 2” of space between each cookie. You may need to use a knife to end each cookie as you pipe it onto the tray. You should get about 3 dozen cookies.
    8. Mix together the ¼ cup of powder sugar and ¼ cup of cane sugar. Sift the mixture over the cookies using a sifter or sieve.
    9. Bake for 15 minutes. Without opening the oven, reduce the temperature to 300°F and bake for 8-10 more minutes. The cookies should be just starting to brown and should be firm to the touch after this time.
    10. Remove to allow the cookies to cool completely on the baking trays before making the tiramisu (about 2 hours later). Once cooled, the cookies can also be stored in an airtight container at room temperature.

    To make the Gluten Free Tiramisu:

    1. Fill a large saucepan with 1-2 inches of water and place another pan in the saucepan so that it sits just above the water line without touching the water (or if you have a double boiler, use it!). Heat the water over medium heat until it is steaming and just barely simmering. Do not allow the water to boil.
    2. Place the egg yolks and sugar into the bowl and start whisking. Whisk for 8-10 minutes. The sugar should dissolve and the mixture should be thick and creamy.
    3. Remove the top pan from over the saucepan and place it in another bowl filled with ice water. Whisk frequently to help the egg yolk mixture cool. Make sure the egg yolk mixture is completely cool before moving onto the next step. It will likely take about 15-20 minutes to cool completely with frequent whisking and a change of ice water. Refrigerate if necessary.
    4. Meanwhile, brew coffee and set out to cool.
    5. In a large mixing bowl, whip the heavy cream until stiff peaks form (use hand-held beaters or a stand-mixer with the whisk attachment). Add the cream cheese and beat until combined. Add the salt and vanilla and beat until mixed.
    6. Turn the mixer onto high speed and whip for about 2 more minutes or until thick and fluffy.
    7. Scoop half of the cooled egg mixture into cream cheese mixture. Mix on low speed until combined. Add the remaining egg yolk mixture and mix on low until smooth and combined. Do not over mix at this point.
    8. To assemble the tiramisu: Spread a thin layer of the cream cheese mixture onto the bottom of a 9×9” pan.
    9. Dunk ladyfingers one at a time very quickly dunk into the cooled coffee (don’t let them get soggy) and arrange them in the bottom of the pan in a single layer.
    10. Spread half of the cream cheese mixture over the ladyfingers. Arrange another layer of dunked ladyfingers on top. Spread the remaining cream cheese mixture over the ladyfingers.
    11. Smooth out the top layer of cream cheese as much as possible. Cover the pan and transfer it to the fridge. Allow the tiramisu to set overnight or for at least 4 hours.
    12. When you are ready to serve, uncover the tiramisu and dust with a layer of cocoa powder. Use a sharp knife to cut even slices or simply scoop the tiramisu out with a spoon! Serves 9-12, depending on the size of the pieces.

    Link to full recipe on Jules’ site.

  • GF Jules Recipe: Apple Fritters

    GF Jules Recipe: Apple Fritters

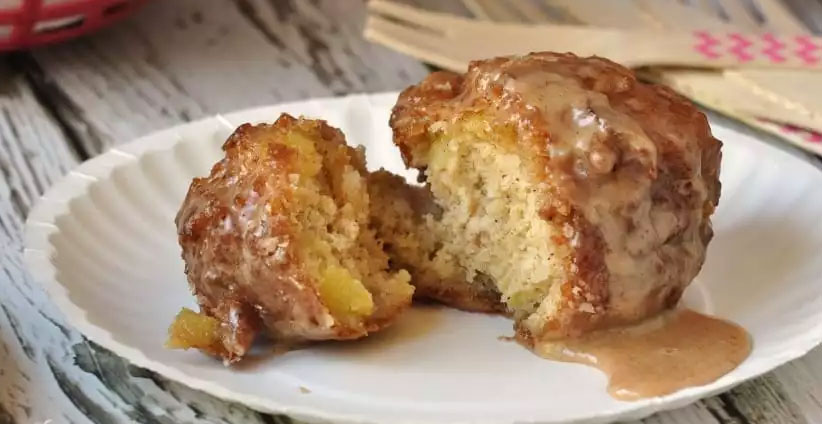
    Let me ask you…does that picture look gluten-free to you? Dare I say…it almost looks…too good?! Crispy on the outside. Yummers on the inside. Let’s do this.

    Apple Fritters

    You know it’s apple fritter season when apples are plentiful and state fairs are happening all around the country. In other words, right about now is the perfect time to make gluten free apple fritters!

    Prep Time: 20 minutes minutes
    Cook Time: 4 minutes minutes
    Servings: 15

    INGREDIENTS

    Fritters

    • 2 cups peeled chopped apples (cut to the size of blueberries) – pat dry if very wet – (Gala, Fuji or other crisp apple)
    • 2 (270) cups (grams) gfJules Gluten Free All Purpose Flour
    • 1/3 cup granulated cane sugar
    • 1 Tbs. baking powder
    • 1/2 tsp. instant yeast (Red Star® Quick Rise*)
    • 1 tsp. sea salt
    • 1½ tsp. ground cinnamon
    • 1/4 tsp. ground nutmeg
    • 2 eggs beaten (or favorite egg substitute like aquafaba)
    • 1 tsp. apple cider vinegar
    • 1 tsp. pure vanilla extract
    • 2 Tbs. coconut oil melted (or vegetable shortening or butter, melted)
    • 1/2 cup apple cider

    Glaze

    • 2 cups confectioner’s sugar
    • 1/4 cup apple cider
    • 1 tsp. pure vanilla extract
    • 1 tsp. pumpkin pie spice

    Additional

    • high heat cooking oil (like vegetable oil) for boiling fritters (enough to fill your pot at least 3 inches)
    • candy thermometer (recommended for measuring heat of oil)

    INSTRUCTIONS

    Fritters

    1. Peel and chop apples to the size of blueberries or small grapes. Pat the pieces dry if they are very juicy. Set aside.
    2. Whisk dry ingredients together in a small bowl. Toss the apples in the dry mixture bowl to coat, then set aside.
    3. In a large mixing bowl, combine wet ingredients listed through melted coconut oil. Once mixed, stir in the dry-apple mixture, adding the apple cider by pouring on top. Stir to combine well, but do not over-mix. The dough should hold together easily when scooped with a spoon; if it is too dry, add more apple cider by the tablespoon until the consistency is right.
    4. Heat 3 cups of vegetable oil in a large pot — or enough to cover the bottom of your pot to about 3 inches. Heat on medium-high to a temperature of 325 ℉. If you have a candy thermometer, affix it to the side of the pot with the tip in the hot oil.
    5. If you do not have a thermometer to test the oil, drop a small amount of batter into hot oil to test: if it burns quickly, the oil is too hot; if it bubbles as pictured in the video — and the fritter begins to gently brown and float — the temperature should be right.
    6. Once the oil is the proper temperature, drop 1/3 cup spoonfuls of batter into the oil, leaving enough room between them so they are not touching. Once the underside of each fritter has browned nicely, use tongs to flip the fritter over to cook on the other side.
    7. Total cook time should be around 3-4 minutes. Remove to drain on paper towels on a wire rack or plate and repeat with remaining batter.

    Glaze

    1. Once cooled, prepare the glaze by whisking all ingredients together in a small, deep bowl. The glaze should be thin but not watery.
    2. Place one fritter inside the glaze bowl and turn over to coat on all sides; remove to a plate and repeat with remaining fritters.
    3. Serve immediately or anytime on the day you make them; if serving later, allow glaze to set, then place in a container with a lid to keep the fritters crisp.

    Link to full recipe on Jules’ site.

  • GF Jules Recipe: Fried Chicken

    GF Jules Recipe: Fried Chicken

    Growing up in Freehold, NJ, my parents would sometimes treat us to Chicken Holiday. I assume you’ve never heard of it. Think KFC. I remember ‘the bucket’ of chicken and my 3 brothers and I basically devouring it in seconds. Ok…fine…maybe minutes. Ah the memories. Want to recapture some of your fried chicken memories? Jules to the rescue.

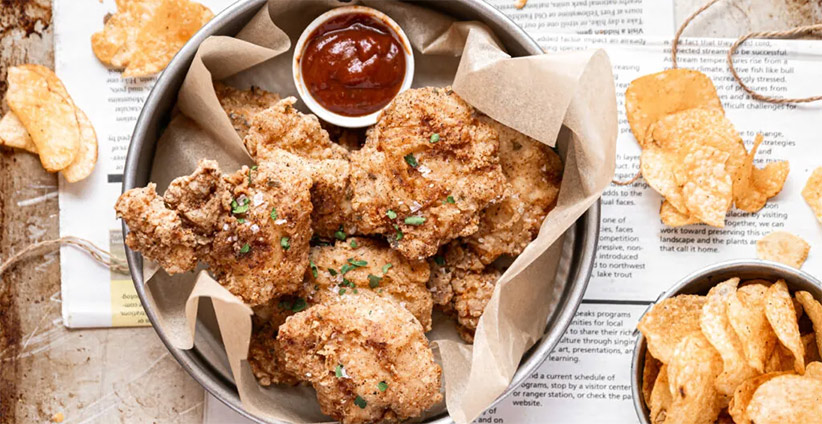
    Fried Chicken

    This homemade gluten-free Fried Chicken Recipe makes enjoying this comfort food possible anytime you crave this classic southern dish! gfJules Flour makes it crispy and delish!

    Prep Time: 10 minutes minutes
    Cook Time: 40 minutes minutes
    Servings: 4

    INGREDIENTS

    • 1 pound boneless, skinless chicken thighs
    • 1 cup milk or dairy-free milk
    • 1 Tablespoon lemon juice
    • 1 (135) cup (grams) gfJules Gluten Free All Purpose Flour
    • 1 teaspoon onion powder
    • 1 teaspoon garlic powder
    • 1 teaspoon salt
    • 1 teaspoon paprika
    • 1 teaspoon oregano, dried
    • 32-48 ounces high heat cooking oil like avocado oil, sunflower oil, or other vegetable oilmelted (or vegetable shortening or butter, melted)
    • 1/2 cup apple cider

    INSTRUCTIONS

    1. Whisk together the milk and lemon juice in a large flat-bottom glass container. Let it set for 5 minutes to curdle./li>
    2. Add the chicken thighs into the milk. Cover with an airtight lid and allow the thighs to marinate for at least 4 hours or overnight./li>
    3. In a shallow bowl, whisk together the flour, onion powder, garlic powder, salt, paprika, and oregano./li>
    4. Pour oil into a deep saucepan, filling to at least 2-3 inches of oil. Heat the oil on the stovetop until it reaches 350°F./li>
    5. Using tongs, take each chicken thigh from the milk mixture and dredge through the flour mixture. Thoroughly coat each chicken thigh with the flour mixture./li>
    6. Transfer 2-3 thighs into the hot oil at a time, taking care not to overcrowd your saucepan. The temperature of the oil will go down when the chicken is added, but try to maintain as close to 350°F as possible throughout the process./li>
    7. Allow the chicken to fry on each side for 6-7 minutes, flipping with tongs so both sides get equal time in the hot oil. The internal temperature of the chicken should be 165°F. Be careful of hot oil splatters!/li>
    8. Remove the fried chicken from the pan and onto a cooling rack or a plate lined with paper towels. Repeat with the remaining coated chicken thighs./li>
    9. Serve fresh and warm for optimum crunchiness. Store leftovers in an airtight container in the fridge and re-heat in an air fryer or oven, not microwave.

    Link to full recipe on Jules’ site.

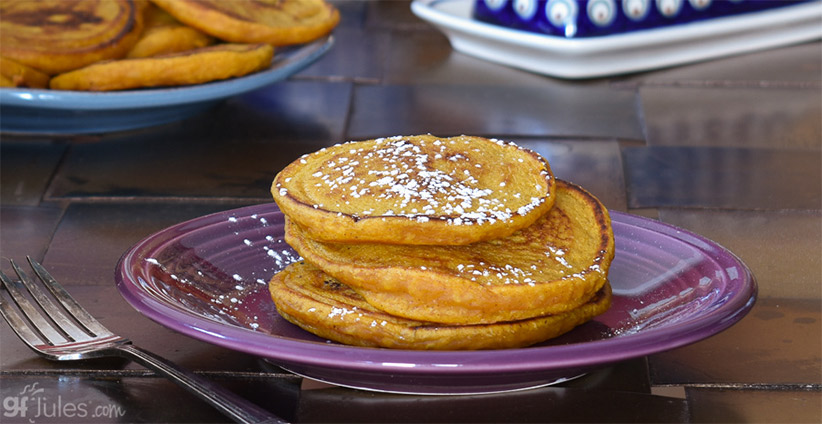
  • GF Jules Recipe: Pumpkin Pancakes

    GF Jules Recipe: Pumpkin Pancakes

    With fall just around the corner (shedding a few tears that summer in Asbury Park is over), why not add some pumpkin spice to your life. I was gonna say “to your breakfast” but who said you can’t have pancakes for dinner! So let’s kick off the first Daily Digest recipe.

    Pumpkin Pancakes

    Healthy pumpkin purée added to these yummy pancakes makes them rich in color, flavor and nutrition! Gluten free and vegan so everyone can enjoy!

    Prep Time: 10 minutes
    Cook Time: 5 minutes
    Eat Time: About 30 seconds 😉

    INGREDIENTS:

    • 1 cup gfJules® All-Purpose Gluten Free Flour
    • 3 Tbs. dairy or non-dairy milk powder (Coconut Milk Powder) OR almond meal
    • 1 Tbs. granulated cane sugar
    • 2 1/2 tsp. baking powder
    • 1/2 tsp. salt
    • 1 1/2 tsp. pumpkin pie spice
    • 3/4 -1 cup apple cider OR apple juice OR orange juice
    • 6 Tbs. pumpkin purée
    • 2 Tbs. vegetable oil or melted coconut oil
    • 1 egg or 2 more Tbs. pumpkin purée as egg replacer
    • 1/4 cup chopped pecans (optional)
    • high heat oil for frying (unless using non-stick pan)
    • chocolate chips (optional) (like Enjoy Life® allergen-free mini chocolate chips)

    INSTRUCTIONS

    1. Whisk flour, milk powder, sugar, baking powder, salt (or gfJules Pancake and Waffle Mix) and spice (plus pecans, if using) together in a large bowl. In a separate bowl, stir together remaining ingredients. Gradually stir the liquid mixture into the dry ingredient bowl.
    2. Heat a griddle or skillet to medium heat and pour just enough oil into your pan to barely cover the entire surface (note: if using a non-stick pan, oil is not necessary).
    3. Spoon batter onto the hot oil in the size and shape you desire. Cook until the batter begins to bubble, then flip; cook the second side until lightly browned.
    4. If making Jack-O-Lantern Pancakes, feel free to add food coloring if you like them looking very orange. Also be sure to cook slowly at a lower temperature so that the faces do not get too darkened and the chips don’t get too melty … or they’ll look like scary Jacks!
    5. Serve with powdered sugar and cinnamon on top, or just with pure maple syrup.

    Link to full recipe on Jules’ site.

    Who is GF Jules?

    Besides being a good human being and a dear friend of mine, here’s more about her.

    As a celiac diagnosed in 1999, and as an indomitable perfectionist with a penchant for equality and fairness, this former domestic violence attorney was simply unwilling to accept the dry, gritty, vacuous foods that were the norm then. Two years in her kitchen later, Jules had perfected an all-purpose gluten free flour blend that enabled her to continue her passion for baking.

    Jules’ mission in life is to make your gluten free life safe, successful, delicious and even fun! All of Jules’ products and recipes focus on helping bringing families back together around the table to share meals again. The same meals. This no-compromise approach is why Jules’ products have been voted #1 again and again in the consumer choice awards and why Jules was voted Gluten Free Person of the Decade in 2020.

    All of her products are certified gluten free and kosher, and are made in a dedicated gluten free facility. They are also certified Free From the Top 9 Food Allergens (NO: wheat, soy, dairy, egg, peanuts, tree nuts, sesame, fish, or crustaceans), non-GMO and proudly made in the USA.